Showing posts with label how to. Show all posts

Chocoholics...BEWARE!! Delightful Gooeiness Ahead!

THE CULPRITS:


1 cup butter, melted

3 cups white sugar

1 tablespoon vanilla extract

4 eggs

1 1/2 cups all-purpose flour

1 cup unsweetened cocoa powder

1 teaspoon salt

1 cup semisweet chocolate chips

**optional…Pam to coat your baking dish**


Preheat oven to 350 degrees F (175 degrees C)and lightly grease a 9x13 baking dish. I used Pam.

Combine the melted butter, sugar, and vanilla in a large bowl. Beat in the eggs, one at a time, mixing well after each, until thoroughly blended….


Sift together the flour, cocoa powder, and salt. Instead of using a sifter, I use a colander. I mix all the ingredients with a spoon as they go thru the colander. Then you want to gradually stir the flour mixture into the chocolate mixture until blended.


****DISCLOSURE…this may cause a huge haze of flour in your kitchen, not allowing you to see a thing, sneeze, then having a truckload (not really) of flour to clean up.***


By hand, stir in the chocolate morsels, then spread the hole yummy thing it in your baking dish.

Bake for 35 to 40 minutes….I always start checking a couple minutes before with my handy dandy toothpick.


Now the instructions say to cool completely before cutting. I never listen to this step, but in this recipe it is IMPORTANT. The top of the brownies still need to harden J

It was either from the sweet fumes coming from these little pretties, or the cloud of flour that immersed me as I stirred them into existence, but unfortunately this is the end of my pictures. I was taking the brownies to a party and I simply forgot to take a picture of the finished ones. I can tell you they were a smashing hit and every morsel was devoured.

Hmmm…maybe I should make more today J


Take a bite...and bask in the glorious deliciousness of CHOCOLATE....like Mr. "M" here.


The original recipe was from
Allrecipes"


Braided Headband Tutorial

When I was younger, I thought that the creative gene had completely missed me, although it ran deeply in my family. I NEVER thought I could draw, paint let alone SEW! I remember when I first decided to start sewing, I asked (let's call her Ms. X) if she could show me how to navigate my way through a pattern. Ms. X was very persistent that patterns had to be followed to a "T". Every notch had to line up, and if not....well HA! So in my ignorance to her, I asked, if the patters are so tedious to follow, could I make my own? I still remember her dauntingly laughing and telling me there was NO WAY!

I am not going to lie and say that this in no way slowed me down, that I victoriously showed her! In fact, it did discourage me. She knew how to sew, and I was just beginning. I did end up trying again and being able to conquer my fears. The best part is that I love to sew, and if I would have listened, I would have missed out on this great blessing.

I wanted to write this for all of you that think that you are not creative. You can't sew. That is way too hard! I am here to tell you...TRY. You may realize that you are creative, you CAN sew and even though some projects can be hard, the end result are worth it....and you may even fall in l♥ve!!

On to the tutorial:The Ribbons and
Pigtail's Braided Headband


With this tut, I wanted to use up my bag of scraps, so I did it with that in mind. All you will need is some scraps, thread, pins and your sewing machine. I am giving you the dimensions that I used for a toddler headband, but you can change it up to make your own.

I started off taking 3 fabrics, lining them up and cutting 3 strips 15" by 3" as seen here:


I folded the 3 strips in half (lengthwise...the 15" turn into 7.5) and stared cutting strips about 3/4 of an inch in width. You will have 3 strips.


**as you can see in the picture, I am going to have more than 3 strips...I doubled it to make 2 headbands**

Now I cut my extender piece. This is the piece that ties around her head. I am going to be making a frayed headband,so I will not finish the edges. I made my ends more fancy like a leaf, feel free to do a square shape.


I folded my fabric, so that when I cut, I would be able to cut 2 pieces at a time. I cut them 8.5" by 1.5".


I ended up with 4 pieces total.

Now back to your strips. The fun part was braiding them. I lined up mu strips and put them under a corner of my sewing machine to hold it down as I braided.


Get your pins and extenders. Sandwich the ends of the braids into the end of the extender and pin in place. Do both sides.


Now we can sew it all together...and use that machine as something other than a weight :)

Start where you have pinned, to secure the braids in place. To hold it in place tightly, go back and forth over it several times.


Now go around the extenders, to keep them quilted together.


Sit back...admire your new headband...**sigh**


Put it on your pretty princess...L♥vely!

lovely


Heather Bullard's blog just brings a smile to my face. She recently posted a tut on making this great soap dispenser from an old mason jar. The instructions look pretty simple and only require one "boy" tool for making the hole in the lid. I will certainly be trying this one out, and once I do, I will post pictures :) We just moved into a new house and through my mind that is clouded with the idea of never ending boxes, I have some ideas for decorating that I CAN'T wait to try out. One of them was using old mason jars for the bathroom to hold toothbrushes, q-tips, cotton balls...etc. This idea fits in perfectly.

Reverse Applique Tutorial

I have a little boy. A little boy that has ONE set of custom clothes that I made over 2 years ago. My husband has not been "in tune" with him wearing boutique clothes....but a couple of days ago, I told him I'd make him something....AND....he HAS NOT STOPPED TAKING ABOUT IT EVER SINCE!! It is a nice alternative to a daughter that has a closet of custom clothing and takes it a bit more for granted.

This boy, he LOVES transformers, so I promised him an appliqued t-shirt. As I (he) was picking the colors I remembered Ashley's reverse applique tutorial here.

Lil Blue Boo?

So here is what I did: Gathered supplies needed:

1. fusible interfacing
2. solid colored t shirt (handmade OR store bought) ;)
3. sharp...did I say sharp scissors
4. sewing machine and thread
5. seam ripper (just in case)

Ok so my first step was deciding on the right colors. Then I decided how large I wanted to make the applique. With that in mind, I cut a piece of the interfacing a tad bit larger than my design and ironed it onto the wrong side of my fabic. I then found the Transformer autobot (VERY important to differentiate that) logo :) I started to draw it on the interfacing.

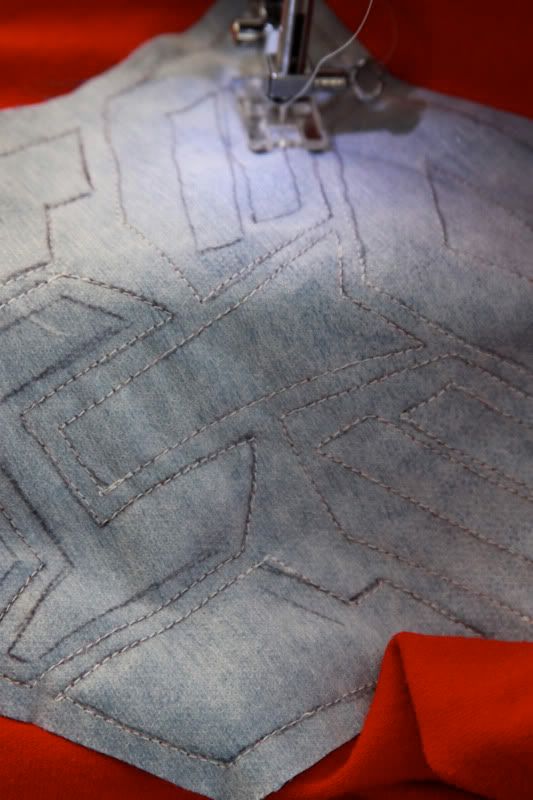
Ok the fun step....I turned the shirt inside out, I pinned the fabric with the interfacing facing me and started to sew a straight stitch around the perimeter.

MAKE VERY VERY sure that as you are tracing your lines, you do not get the bottom of the shirt caught underneath the needle, sew it together as one piece and then pull your hair out in frustration...just saying ;)

Another **Tip** is that I back stitched at the beginning and end of each line (look at the pic below and you can see where the stitching is a little darker at the edges)

Once you have finished your stitching, turn your shirt back to the right side, and it should look something like this:


As you can see, it is not perfect, but with this type of applique, that is ok, almost better. Also I only stitched around once.

Now take out you sharpest scissors (also the smaller the better when trying to get into small spaces) Clip away at the areas that YOU want to see the under lying fabric come through on the design.

clip clip clip away....until you are happy with your design! (also keep in mind that once you wash it, the knit fabric will curl a little)

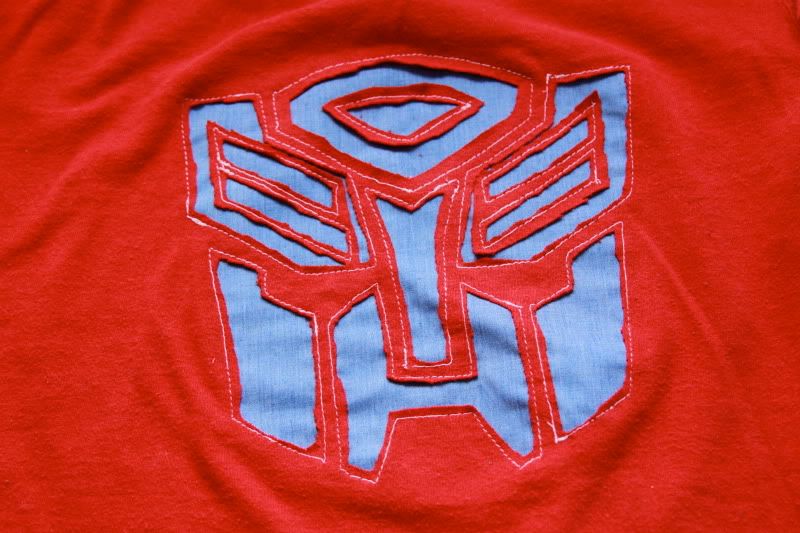
Here's mine: